Showing posts with label Dye painting. Show all posts

Friday, May 11, 2018

Before The After Quilt


tuttifruittiquilt (1)
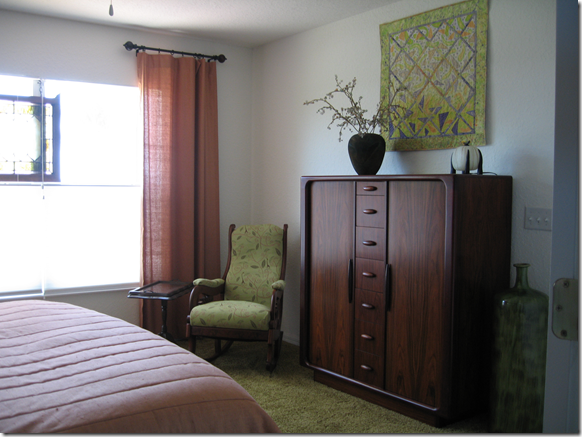
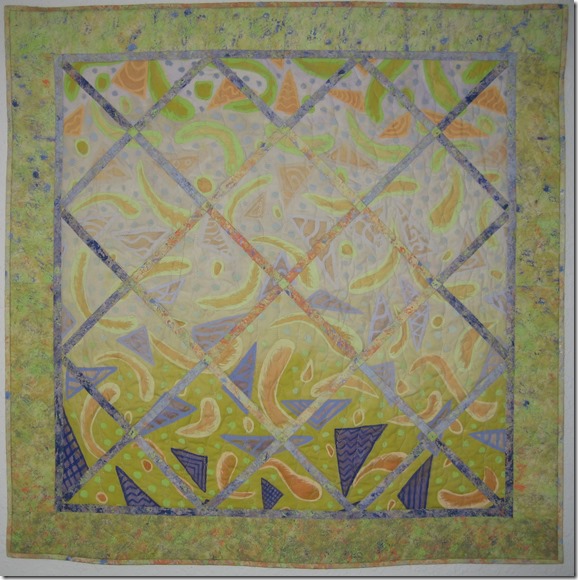
This is the quilt that was displaced when I hung the new one over the dresser.
I never tired of looking at it for the 13 years it hung there.
It was created from some not so big pieces of fabric I dye painted and then over painted with paint. I used almost every bit of the fabrics.

It uses a split complementary color scheme.
I designed it to have “color” weight at the bottom.
The grid was created from an even smaller piece of fabric using the color weight shifting from light in the center to darker at the edges.
The border fabric and binding had an even coloration which allowed the rest of the quilt to be the star of the show.
image

Thursday, May 10, 2018

Rambling Rose

Rambling rosefinished
This is a time lapse quilt.
I made the background planning on it being a quilt and realized it didn’t work.
It was put aside until a new idea popped up.
I did some applique with an assortment of odd fabrics and then it was put aside again.
Eventually I finished the applique and quilted it. All that was left to do was finish it with a binding and put a casing on the back to hang it.
It is not unusual for a quilt to take over 10 years to tell me what it wants to be. When I listen the results are worth it.

Thursday, June 12, 2014

Perfection Or Procrastination?

Many years ago I took a fabric painting class from Hollis Chatelain who’s work I greatly admired.

Of course I didn’t want to make quilts that looked like they were done by her.

I wanted to learn the techniques she used.

She was an excellent teacher.
image

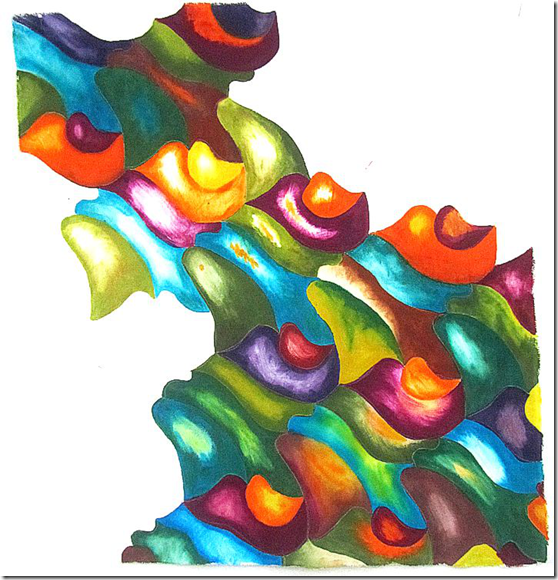
While going through drawers looking for something the other evening I found this piece I started in her class.

I usually work fast, but this technique didn’t allow me to finish this in the class time.

I put it away along with the fabric I had also hoped to paint for the borders and intended to finish painting it.

One of the problems was I didn’t even know what colors I had used. I was concerned that if I used different colors it would be so obvious and take away from the beauty of the piece.

image

The overall design on the piece is a tessellation I quickly created from an index card.

image

This close-up shows the area of the tessellated shape you saw in the last picture.

image

I broke the tessellated shapes into 5 different units. I hope you can see the pencils likes I drew on the fabric in this gray scale image.

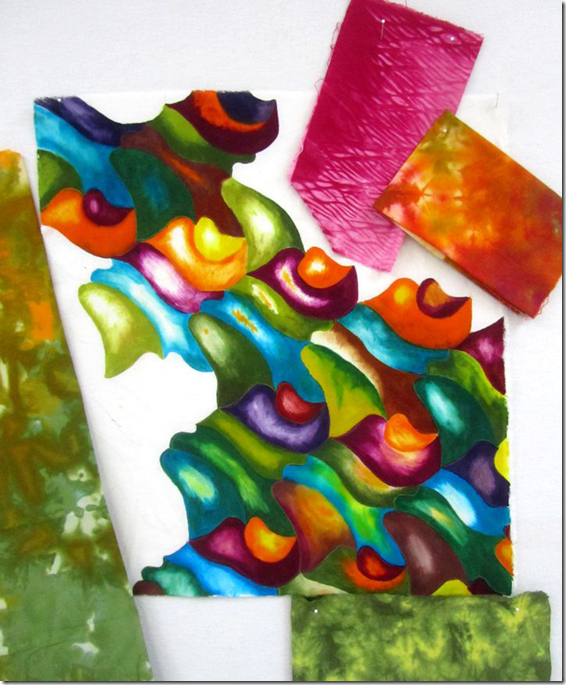
When I unearthed this I decided that rather than finish painting this I could combine it with some of my hand dyed fabrics to create a more pleasing composition.
image

In this photo I am auditioning some possible fabrics I could use with it.

I believe this is going to be something that will take me a while to resolve.

This will remain on my design wall so I can look at it as I am working on other things in the near future.

When I resolve it you will be the first to know!
Thursday, August 2, 2012

The Long Winding Roads

Subtitle: You Can’t Get There From Here

image

I started with a piece of fabric I dye painted for this quilt.

image

I decided it needed something else so I inserted 5 different curved strips of hand dyed fabric.

At that point it seemed a little disconnected so I mixed up some black paint and connected the path around the BIG dots.

image

The quilting on this was the type I so enjoy doing – curved lines that somewhat follow the design of the quilt.

The border was quilted separately.

The quilt is a slightly irregular shape.

Friday, July 20, 2012

Crazy About Color–Another Finish

image

I LOVE Crazy quilts. This is probably as close as I’ll ever get to making one! This was made from only two pieces of fabric.

When I finished dye painting them I had no idea what I would do with either one of them.

I used a similar palette of colors on both of them and was able to cut 4 strips from one and keep the other as a whole cloth section.

The quilting on this was minimal which gives the quilt a soft comfortable look, yet it also will hang well on a wall. It IS a wall size quilt.

I’d love something with this combination of fabric, batting and backing to use as a blankie. Only problem, I can’t remember what I used for the fabric on the front and I really don’t need another blankie!


I  just winged it when I painted the sections that became the borders. I had no plan and just started painting which is how I often work. The borders were angled more than a little which also created a challenge using them. When I got the borders added to the center section I was not satisfied with the quilt. I knew it needed something, but it took me some time to come up with an idea of what to do with it.

My solution was to get out some fabric paints and add some detail work and shading to the quilt. Then it languished while I figured out how I wanted to quilt it – and also found time to finish it.

image

I thought you might like to see a close up of the detail work on the center section of the quilt.