Wednesday, June 30, 2010

Quilting Granny invited the girls over for a quilting bee!


I have been preoccupied recently and haven't been spending much time with Quilting Granny on her side of the studio.
I guess she looked across the studio and saw some potential quilters.
She invited them over for a quilting bee.
Her new friends are:
Polly Pocket Book
Sinclair Purple Hair
Brenda Bobby Soxer
I haven't seen them pick up a needle and fabric yet!

While they were busy at their quilting bee I have been busy doing more organizing in the studio and also getting rid of things. My goal is to fill a HUGE garbage can each week and also to fill the car and take it to the donation center each week. I filled the garbage can and also a recycling container that is the same size this week.
Tomorrow I'll be making a trip to the donation center.


I'm also trying to photograph some of my works in progress so I can share them with you.


This is an Origami Flying geese quilt. It is so much fun to do and is slightly dimensional.
It is a carefully planned scrap type quilt. If you look carefully you will see there are just a few very light pieces. I have a hard time using lights and was so tempted to not use them. If you would see this quilt without them it would be so dull, boring and look the same all over. The light pieces make this quilt sparkle.
I used a Jinny Beyer border stripe between each row of geese.


I had to apologize to my sister in law Mary when I saw her this morning for not posting a puzzle for a few days.
She had done every puzzle I have ever posted. Is there anyone else out there who can say that?
Click to Mix and Solve

Monday, June 28, 2010

You Can Print Your Own Blog Book


So many of you have asked where I had my blog books printed.
I now have a link at the right where you can click and order one from your own blog.

I am so pleased with the quality of them. It's a great way to document your blog and everything on it.

It is SO easy to do this with all the help that is provided once you click on that icon at the right.

Several people asked me about the cost. I don't think I could print my blog posts myself for what these cost. Your cost is based on the number of pages, as well as whether you want a hard or soft cover. They start at $14.95 for a 20 pages soft cover book and the hard cover starts at $24.95. Additional pages are only 35 cents.
They also provide FREE SHIPPING.

Everyone who comes to my house picks these up and looks at them. I have to admit I, too, enjoy looking at them.


This is my first book and it contains all my posts from 2008. I decided to start with a red cover and I am working my way through the rainbow with the subsequent books.
I had looked into other services that allow you to print a book, but none of them were as easy to use nor as well suited for printing a blog.


This book with the orange cover has all my posts for the first half of 2009.

There are many cover designs available besides the ones I chose.


This book with the yellow cover contains all my posts from the second half of 2009.

I am so excited because after only one more post to my blog I will be able to order my first book from 2010.

If you don't want to print your entire blog you can select parts of it to print.

I think it would be great to pick some of your best posts and have books made up for friends. This could be done very economically and your friends would have a keepsake from your blog.

If you feature your family you could have just the posts that include your family put in a book for them.

What other ideas do you have about printing selective books? Your quilts? Your garden? Your home projects? Your pets? Your travel? A special group of friends? Your favorite recipes? The possibilities are endless.
I hope you'll have as much fun with this as I have.

I also feel this will outlast anything I could have printed myself and looks so much more professional.

They Can't Take That Away From Me - COLOR

This blog is about quilts and also about COLOR.
I'd like to share a few of the ways I put colors together. I use similar principles when quilting and decorating.


I put together a new grouping of my gazing balls on the deck. The two smaller gold balls are the accent color. I chose it to emphasize the gold in the larger ball.


I purchased both of these glass pieces from the same artist. I had intended to use them each in a different place, but they worked so much better together. The grouping was complete when I found this clay piece.


When I found this painting I knew it was the right piece for this spot. It has so many colors it is the type of art you can use almost anywhere. I don't choose my art "to match the sofa". The lamp spoke to me immediately when I saw it and it said "I want to come home with you". The plant is lucky bamboo that I got from my family at least 10 years ago. It grew to at least twice the size it is now before I trimmed it to a more manageable size. The black iron piece completes this group and grounds it.


I love each one of these pieces as an individual item. I have used the lamp and the bear in other places in the house. When I found the piece that is hanging on the wall I knew these were destined to be be displayed together.

I am happiest when I am surrounded with beautiful colorful things. These are a few of the things that make me happy.

Almost all of these are things I've had for a long time. I just continue to put them together or arrange them indifferent ways. There are no friends like old friends and these things are indeed old friends.

Sunday, June 27, 2010

Perfect Painted Patchwork Furniture

You don't have to be a quilter to fall in love with the patchwork furniture.


I'd love to have this dresser in my home.


If you have an old dresser with good lines and drawers that work you can paint it to give it a new life. I wouldn't want to do this with a valuable antique.


When I look at this dresser it makes me think the effect could also be achieved with wall paper or fabric. If I were to use either of those I would be sure to apply an appropriate sealer after I had covered it.


Even mirrors can be painted as an accent to coordinate with your decor.


I love this fun and funky mirror. I have several old mirrors and my mind is racing thinking about which one to paint. I have an old mirror with very cloudy glass. Since this would be more of a decorative accessory than a mirror to look in I think that would be very interesting.

If you don't have a mirror or piece of furniture to paint, look at flea markets, rummage and tag sales or ask your friends or family if they have any they'd like to get rid of. You could buy a new one in a home decorating or craft store.

The skies the limit when you create your own one of a kind piece of furniture or accessory.

Saturday, June 26, 2010

One Green Thumb Per Family


You've seen what I grow in a previous blog post - Gazing Balls.
This is my oldest son's yard. He got the green thumb in our family.


I think his thumb is also pink, purple, orange and yellow. It is amazing seeing all the flowers that grow in the partially shaded yard.
Among the flowers there are vegetables and fruits too.


I can't get over the profusion of gorgeous day lilies. I planted 3 in my yard and they didn't survive. They are all over his yard - front, back, sides, up the hill, and they are all so colorful.


There is even a cute little potting shed tucked among the flowers and walkways.

Friday, June 25, 2010

True Love


Last night I went over to visit my two new grandogs. I visited my friend Sally in Florida and loved her puppies. I was so impressed with the way she raised and handled them in such a gentle loving way.
When I told my son and daughter in law about them it didn't take them long to decide to make the two puppies part of their family.

They arrived in Milwaukee on Delta Airlines just before our storm hit Friday. They made the trip with no problems. It was love at first sight for the puppies and the family.


I don't know who was having the most fun when I was there - the puppies or the grandchildren. It was hard to take photos as they were so active. It is obvious the puppies are loving all the attention and the kids are loving the puppies.


Even before the puppies arrived Cooper claimed Fred as his puppy and Kierstin has claimed Marlo.
It tired me out just watching them play together.

When I left about an hour after that each puppy had gone into their crate where they seem to love it. What a wonderful beginning to a long and happy relationship between the puppies and their new family.

Thursday, June 24, 2010

Cooking up a storm!

I'll be the first to admit I don't spend a lot of time in the kitchen any more.

I am most likely to cook when I have company.


Saturday evening I made a delicious dinner for my family.
I roasted vegetables that included home grown asparagus, sweet potatoes, white potatoes, mushrooms and Vidalia onions.
I broiled salmon. I try to serve salmon on or close to my grandson Nicholas' birthday each year. It is one of his very favorites.
I served these with a great french bread with garlic cloves throughout and my last bottle of 2 buck Chuck Chardonnay for the adults and milk for the grandchildren.

Roasted vegetables are so healthy and so easy.
I just cut them into large pieces and place on a cookie sheet I've lined with aluminum foil to make clean up easier.
I spread a very small amount of EVOO over the foil so the vegetables don't stick.
I drizzle a very small amount of EVOO over the vegetables and toss to coat.
I would guess the total amount of EVOO I use is one Tablespoon or less, depending on how many vegetables I am roasting.
30 minutes in a 350 degree oven and they're ready to eat.
I love to eat the leftovers cold for lunch the next day.
I don't usually even salt, pepper or season them although I know many people do.

I made a batch of fudge for dessert. Fudge has been a tradition for Father's Day in our family since we started vacationing in Eagle River, WI about 30 years ago. Even though we weren't in Eagle River, I knew the family would enjoy the fudge.
They certainly did and when they got home my granddaughter emailed me for the simple recipe I use.


While I was thinking about what to have for lunch today a friend sent me the menu from a French Restaurant in Florida. Of course it made my mouth water.
It also got my mind working when I saw a marinated salmon salad.
I had a small piece of salmon left so I flaked it and marinated it in Catalina dressing.
I put this on some crisp lettuce and added some large green grapes. I buttered two slices of the bread left from our dinner. It was a lunch to remember and I look forward to repeating it in the future.

Wednesday, June 23, 2010

Red, White and Blue

I love to add special little touches to my surroundings for holidays or other special occasions.

The Fourth of July was an important holiday while I was growing up in Racine, Wisconsin. Although it is still almost 2 weeks until the 4th the party begins now!


I'll never forget:

Fourth of July Fireworks at Washington Park Golf Course and the swaying bridge crossing Root River - And Coupons for Cracker Jacks and Ice Cream from the Schools.

Parades with Racine's musical units -- the Elks Band, Boy Scouts, Kilties and Boys of '76, Johnson's Wax Band, Park Board Band, the baton twirlers, and the beautiful floats in the parade

We also had so much fun decorating our bicycles and wagons for the neighborhood park parades.


I made this flag from 6 layers of flag print fabric. I used the Faux Chenille Technique. When I washed it the fabrics did not bloom like I had hoped. I would guess the fabric had a large percentage of polyester along with the cotton. It is still a fun flag with some texture.


This closeup shows the texture clearer.
I made this several years ago and somehow never got around to displaying it. When I started to look for it it took me quite a while. Even when I remembered approximately where it was I still didn't see it right away.


I also associate home made strawberry jam with this time of year. With the home grown strawberries I bought at the farmer's market last week I made a batch of freezer jam. It is absolutely positively delicious if I do say so myself. My family agrees!

USA for the bright red strawberry jam.
Click to Mix and Solve

Tuesday, June 22, 2010

Tuesday Tessellation Tutorial Time - Lesson 3

I know many of you are ready to start and have your supplies ready so wait no longer!

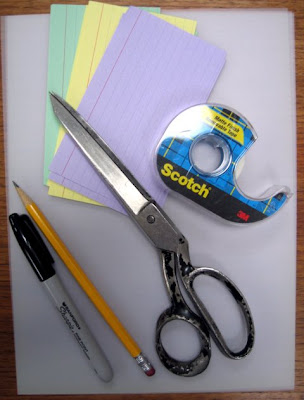
For the first lesson we will need these supplies:

Package of lined 3 x 5 index cards (or you can use 4 x 6 cards)
Removable Scotch Tape (Blue Plaid dispenser)
Pencil
Paper scissors
Black permanent felt tip marker


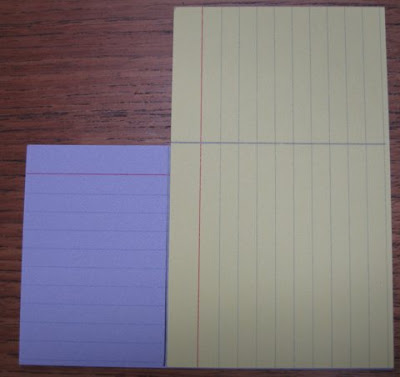
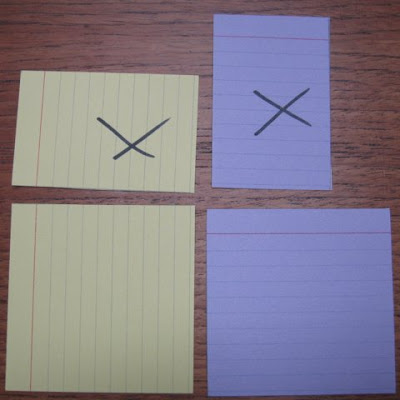
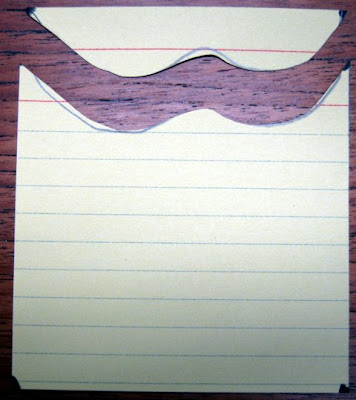
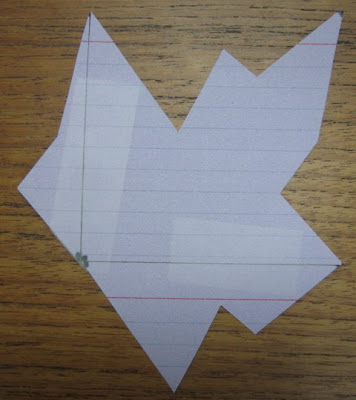
1. Prepare several index cards by cutting off a section so you have a square.

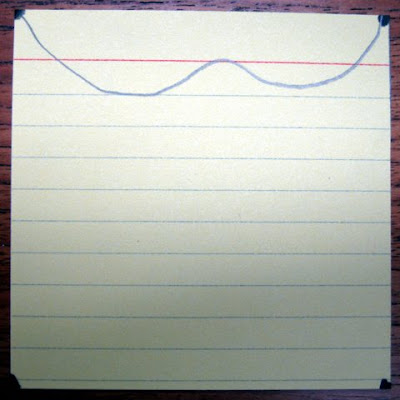
2. With felt tip marker put a dot in each corner of the cards.

3. Using a pencil draw a line from one corner to the other across a card. (This means the direction the lines on your cards go.)
A. This line can be angled or curved.
B. Do not go beyond the corner.
C. You may stop before you get to the corner but I find the resulting tessellating shapes are more interesting if you draw corner to corner.

4. Cut along the line you have just drawn with your paper scissors.

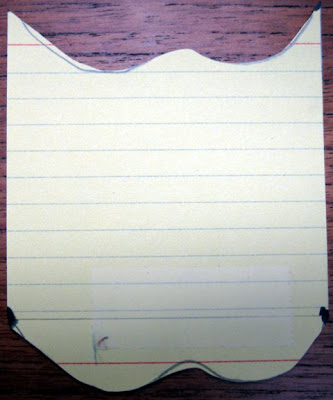
5. Move that section to the opposite edge and tape it in place with your removable tape. Be sure the corners line up before taping. Be sure and keep the lines side of your card up.

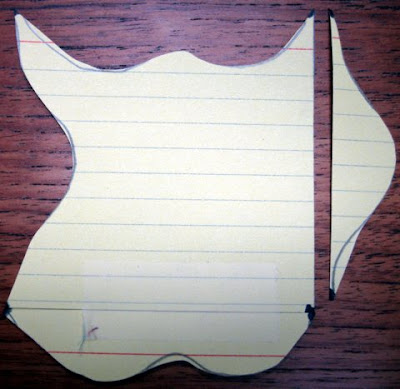
6. Draw a line on the vertical edge of your square. Choose a different shape for this line.

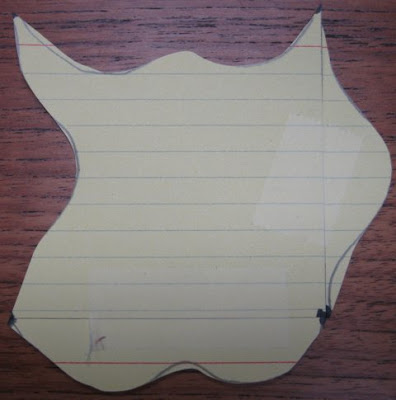
7. Cut along this line and move it to the opposite edge and tape in place, being sure corners and lines on card match.

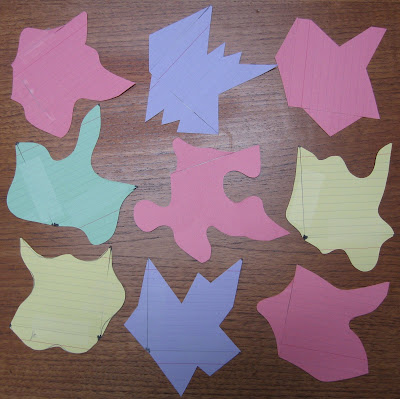
8. You now have a shape that will tessellate.

9. Get another card and repeat with different lines.

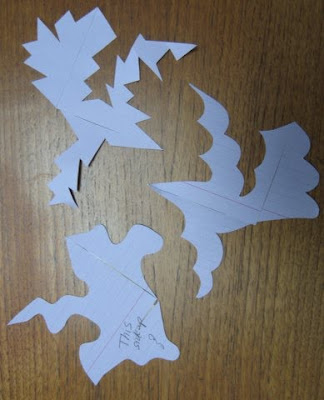
10. After you have done this a few times you will find you don't have to draw the lines. You can just freehand cut with your scissors. I find people are less inhibited when you cut directly without drawing first and get some of your most interesting shapes this way.

11. Keep you supplies handy and continue making shapes any time you have a spare moment. Some will be more interesting than others.

12. Do NOT try to make a shape that suggests a specific thing. Let whatever happens happen. Often a shape will make you think of a particular thing. It is not necessary that your shape resemble anything for this project.

If you were doing a pieced quilt many of these shapes would be next to impossible to piece.

Since we are doing a fused quilt we have many choices for shapes we can use.

Just have fun and create as many different shapes as you can. In the next lesson you will learn how to choose a shape to use in your quilt.

Monday, June 21, 2010

Polyester Double Knit - You liked it, you really liked it!

Paraphrasing Sally Field!

And now, presenting: MORE TO LIKE!


This halter style mini dress is just so typical 70's. It brings back fond memories.


As we continued photographing Jessica in my clothes her confidence as a model grew.

Technically this was the most complex garment of the group. The design required great care to draft. Construction required precision.


I used an invisible zipper at the center back of this dress. Using one of these was a challenge to do properly. Using this and matching the color changes was a herculean task. I can't believe I was able to do such precision work, but the proof is here for you to see.

And for you younger readers, you may have never even seen an invisible zipper. It's only obvious when you see the pull at the top.


Jessica was joined by her two younger brothers on the deck for this photo.


Too soon it was time for them to bid me farewell and head home.

Time for another puzzle.
Click to Mix and Solve

Sunday, June 20, 2010

Bring Back Polyester Double Knits!

We had a lot of fun yesterday.
My son, daughter in law and 3 of their children are here from Minnesota.

I asked my son if he would get a few things from the back of my attic for me and he was so happy to help.

He brought out 8 boxes of clothes I had saved from various stages of my life.


They included clothes from high school, my prom dress, my silk tea dresses from college, my wedding dress, many casual clothes I had designed and my "fine" polyester double knit creations. These were all clothes I had made and designed.

Julie, Jessica and I had so much fun opening the boxes and looking at them.


We realized Jessica was about the height and size I was when I made them.


I took the "fine" polyester double knits downstairs and washed them.

When I saw how beautifully they washed and dried I wondered why we ever stopped wearing them!

I think I will start a new campaign.
BRING BACK POLYESTER DOUBLE KNITS!


We call this dress the "Safety Patrol" dress. What was I thinking when I made this? It is an original design by me. I suppose in the late 60's it was quite stylish?