Showing posts with label Fabric. Show all posts

Saturday, September 17, 2016

My Fabric Collection Rearranged

image
I decided I wanted my fabrics arranged in a different configuration. This is the new arrangement.image
This was the previous arrangement. Can you see the difference?
I made 3 main changes.
1. I moved the solids to the top area.
2. I rearranged all the prints flowing from left to right.
3. I pulled several different categories of fabric from the mix and put each one in their own area.
It took me several days to make it work but I was thrilled when I completed the project last night. To do this often I had to move groups of fabrics at least 3 times to make room for what would occupy the space,.

I am very pleased with the new arrangement and it will help me to find things and inspire me to create new work.

image
This section contains all my Nancy Crow commercial fabrics.
I will share more sections in future posts.

Sunday, February 14, 2016

Selecting Possible Fabrics To Add To A Quilt

image
When I am starting a project or adding to an already started project I get out a grouping of fabrics that relate to what I have in mind or what I have started.
quilt with salmon painted start
This is the group I selected to hopefully finish this quilt I showed you recently. I have used some of these fabrics in previous compositions so there may be just a little of some of the fabrics. Being limited this way can be a good thing as it makes me use my critical thinking to solve these opportunities…something some of you might consider problems.
All of the fabrics I chose have either been hand painted or hand dyed by me, Some have layers of pattern, both painted and/or dyed. The group also includes some fabrics I consider failures or ugly fabrics. Almost any fabric is a success as it can be cut up and when seen in a smaller strip or section can be very useful.
As I work on a project like this they no long are all neat and organized like this. You might even call it a “mess”! Having them in this mess style lets me see the possible combinations and when I open a piece of fabric I see things I may not have seen when it was folded neatly.
This is one way I work. I know some of you want the answers before you cut your fabrics. If I knew what it was going to look like before I started to me there would be no reason to make it as it had already been done! I also never worry about wasting a piece of fabric as if it doesn’t work in this composition it might be the perfect piece for the next one.
I hope this will not only give you an insight into how I work, but possibly rethink your ideas on how you work.

Monday, November 23, 2015

The Twelve Days Of Thanksgiving….Day Nine

I am so happy my life lead me to quilting.

The first time I tried it at about 13 years old the project ended up in the wastebasket

I’ve had a lifelong affair with fabric and color which eventually led me to quilting.

Since my Mom didn’t sew much fabric was not something we had laying around the house. I treasured each little bit I found and used it to make doll clothes.

From there I transitioned into making myself a costume on the sewing machine with crepe paper…..but it was summer and when I perspired the color ran.

image

I eventually learned to make my own clothes and nothing was too challenging for me.
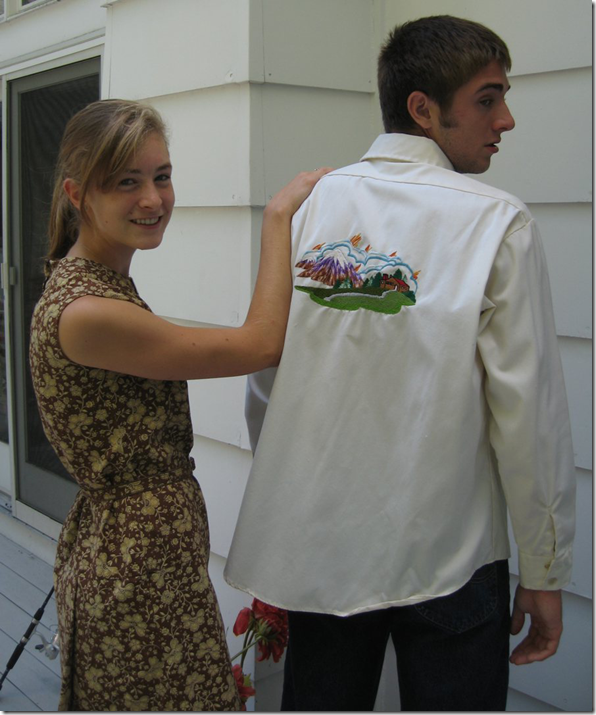
image

I started teach for our local technical college almost 50 years ago. I taught all areas of sewing courses.

The most popular was my Sewing With Knits, long before those sewing with knit stores appeared on the scene.

image

Of course I ended up with a lot of scraps of polyester double knits which lead me into making and teaching quilted pillows and small quilts with polyester double knits.
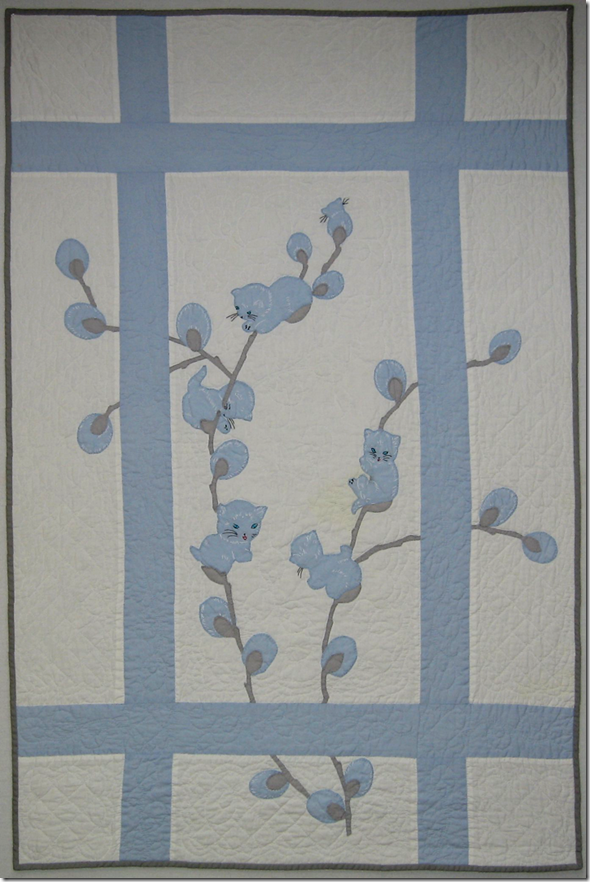
image

My first quilt made from a Lee Wards kit.
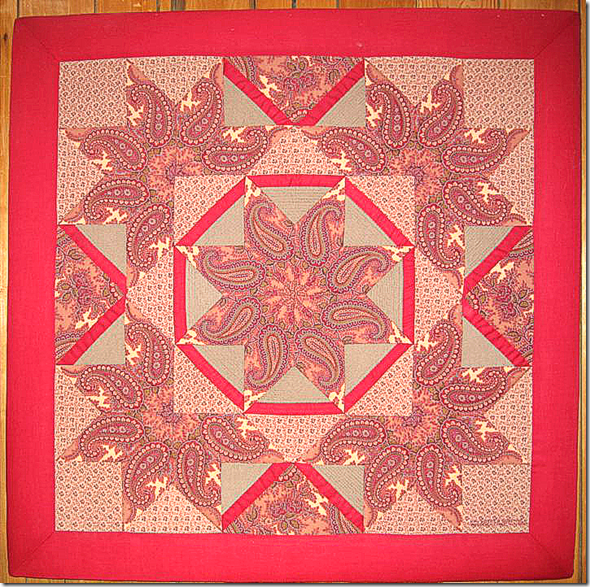
image

The jump to sewing with quilting cottons was the next step, although it was hard to find fabrics and supplies in the 70’s.
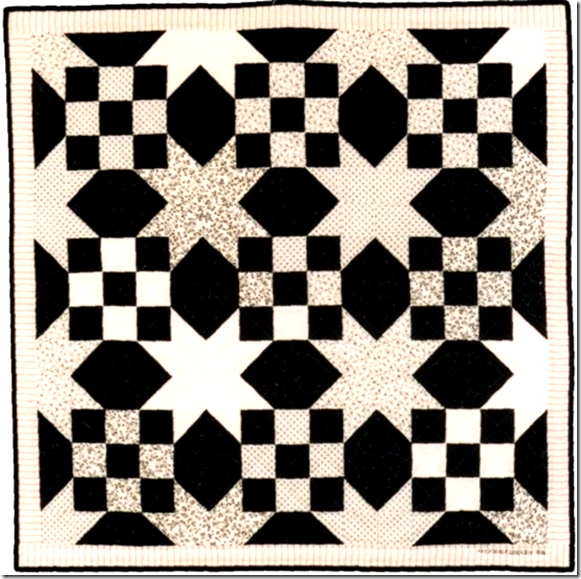
image

image

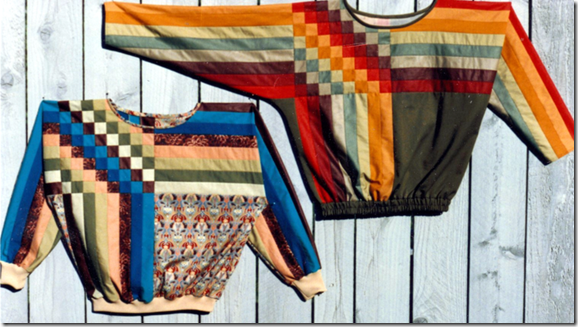
I taught many quilting and quilted/patchwork clothing classes and designed my own patterns for them.

That kept me very busy and I thoroughly enjoyed it and the people I met.

image

I travelled around the country doing some teaching when I had time.

Eventually I gave up the teaching, lecturing and style shows when my husband retired.

I now work on finishing my own Works In Progress and create a lot of new work that speaks to my soul.

I do miss my students but I have kept in touch with many of them.

I also have found my quilting has allowed me to meet and become friends with many new people.

I’ve won some ribbons and big awards but that is not what keeps me involved.

To me creating is as necessary as breathing.

How lucky can one girl be?

Thursday, August 20, 2015

Piles Of Projects–A Mini Tour Of My Studio Work

Today I want to share some photos from my studio.

This may give you a better idea how I keep track of some of my projects and current fabrics.

image

I keep some (not all) of my works in progress on these two quilt racks for easy access.

image

This is a piece of fabric I started to dye paint a tessellation on years ago. I have decided to piece the white areas using this group of hand dyed fabrics I created.

image

My drafting table is a good place for more of my works in progress. By the time I got my drafting table I was doing most things on the computer so it hardly was used for it’s intended purpose!

image

My antique library table is the perfect spot for a large portion of my dyes fabrics so I can see them and have easy access to create on the design wall.

image

Ice dyed fabrics on the back of a chair.

image

Commercial fabrics in wire baskets atop crocks that hold ???!

The smaller basket holds a select group of scraps for a possible project.

I use an eclectic group of containers/furniture in my studio. If it works I use it. If it doesn’t it’s gone.

I hope you enjoyed this mini tour of my studio and drank in all the color I love to share.

I always love to see how others keep track of things in their surroundings, being it a studio or their home.

Thursday, April 10, 2014

Pointillist Palette 1 and 2

20 years ago Robert Kaufman produced Pointillist Palette 1 by Michael Mrowka and Debra Lunn.
image
This is the front of the quilt I created with the first collection.
image
This is the back of that quilt.
Pointillist palette  picture edited
This is the Pointillist Palette 2 from Lunn Studios
The patterning of the fabric is the same but the color changes go the full width of the fabric.
Some of them shade light to dark and others shade through 2 or more colors.
It will be introduced to stores at Quilt Market and will be available in your local fabric shop in the near future.
The fabric is so great and the possibilities for using it are endless. I would suggest you stock up on all the colors when it becomes available.
I was invited to create a quilt from these fabrics for Kaufman.
This is the secret mystery project I couldn’t tell you about until now.
Stay tuned as I’ll be sharing more about this quilt soon.

Monday, April 8, 2013

When Does 1 - .95 + 2 - .8 = ONE?

image

This may make sense to you if you follow my blog!

The quilt I made with my fabric I designed used about 95% of the fabric I had.

The quilt I made using my hand dyes used about 80% of that group of fabrics.

So when I put the leftovers from these two quilts together I got ONE new quilt.

image

The red strips in this quilt are a scant 1/8 inch wide. I put the pencil in the photo to give you a reference point with the lead from the pencil.

There is a very small amount of the fabrics from these quilts left so don’t bet on seeing them again soon!

This is another one that will not be quilted until I have time to study it and decide what I will do.

Wednesday, April 3, 2013

Proud As A Peacock – Close Up

image

Yesterday I shared a picture of a yard of this fabric.

Today I am sharing a close up view of approximately an 8 by 8 inch square of the fabric.

I think this gives you a clearer idea of the detail on the fabric.

image

This is the overall view from yesterday.

It is now available for sale at:

http://www.spoonflower.com/designs/1894394

Remember, I would LOVE to see photos of what you make with my fabrics!

Tuesday, February 26, 2013

It’s Not Over Until It’s Over!

image

I made this pincushion from my pile of BIG scraps.

image

I stuffed it with scraps of wool batting. It is about 4 x 5 inches. It’s perfect to keep my pins separated by different colors and sizes.

image

This is the quilt I made with my “scraps too small of use”! It is 6 x 8 inches.

image

And just as there is a beginning, there also is an end. These are the little bits I had left and they all went into the trash!

Saturday, February 2, 2013

It All Started With The Dining Room Chair Fabric

image

In case you are one of those people who are wondering how anyone could have 3 yards of lime green Ultrasuede in their closet, I will explain!

I took my granddaughters to Club Libby Lu and out for lunch about 8 years ago.

I was acquiring things to decorate this house at that time. After lunch we stopped at Manhattan Textiles to look for fabric for my dining room chairs.

My granddaughter Dana found this fabric. At first I wasn’t sure, but I decided it would be a good choice. I bought enough to cover the seats of the 6 dining room chairs.

My next trip to Manhattan Textiles was about 6 months later to find an area rug and fabric to make window treatments.

I found the fabric with the triangles on it which was the companion fabric for the dining room chair fabric. I bought this for the window treatments.

I also purchased the iridescent pink silk and the lime green Ultrasuede. In addition to that I bought many yards of a pink fringe.

My plan was to use the triangle print for the panels on the sides of the windows.

I planned on creating large triangles above the windows alternating the three fabrics and finishing the edges with the fringe.

It took me several months to figure this all out so that the triangles overlapped correctly and did not show the top edge of the window frames.

AND THEN……………I realized that with all this detail on the windows/sliding glass doors I would detract from the view we have. It is one of the best views of any house in the area.

So even though I had spent more than I ever had before on these fabrics I have left the windows unadorned and the fabric in the closet. I am so glad I made that decision.

I did use some of the triangle fabric to cover the table I use for a small Christmas tree.

image

Now I have used almost all the Ultrasuede for the pillows.

Who knows? I may find someplace to use the rest of the fabric someday!

Tuesday, May 8, 2012

Artist Trading Cards

Our little group of art quilters did an artist trading card exchange today.

Artist trading cardskays

These are the cards I made for the exchange. I used some Arashi Shibori fabric I dyed.

I embellished each of them with a “jewel” and some super fine glitter.

Artist trading cards others

These are the cards made by the rest of the group.

It never ceases to amaze me the variety of ideas and techniques the participants use in a project of this type.

As we exchanged them today we each shared what we did and how we did them.

As I look at each one I see the people who made them. We each used something that was really quite personal in them, whether we realized it or not.

We also shared ideas on how to display them.

Carol is going to hang hers on a ribbon, attaching only at the top so they can be turned over to see the signature.

I mentioned displaying them in a bowl as I do with mine in my guest room. Another idea is to use the clear plastic picks you get in a floral arrangement that holds the card telling you who it is from. You can put each card in a floral pick and display them in a plant, a flower pot or something else.

Monday, January 30, 2012

I Planted Quilt Seeds!

There are days when I just want to sew, sew, sew.
I don't want to think, cut, design, quilt, or finish a quilt.

I had a good size bin of scraps. It also contained quite a few fat quarters.


So I decided to use my Accuquilt GO fabric cutter and cut them all into squares, triangles and strips.


Now the bin is empty and I have two trays full of seeds.

I can randomly sew these together and eventually they can become something.

Maybe they'll be utilitarian quilts, possibly art, or they could also become smaller items.

Normally if I start to work with the pieces in a scrap bin for a project, when I get done the bin is fuller than when I started.

This is definitely a first!

This time I threw away the "scraps too small to use" and it was a good feeling!

Maybe you can put my "scraps" back together as you do this puzzle!
Click to Mix and Solve

Tuesday, September 13, 2011

Studio - Putting Fabrics Back On Shelves


This is my main quilting fabric collection.
I take fabrics out, buy new fabrics or find fabrics put in another part of the shelving.
I have been putting them in a pile on the bookcase so they can be put where they rightfully belong.


My granddaughter Heidi is working for me in her spare time doing all those things I can use help with. She works 2 other jobs, but this job is made for her.
When she was about 3 she could arrange the crayons in a box of crayons in color flow order. I trust her to put each fabric in the correct space.

I know it looks like this is FULL, but since I took out all the batiks and some of the novelty fabrics there is space in certain areas. We can spread out and condense things to make them all fit.

Thursday, June 17, 2010

Tessellation Tutorial - Fabric Choices - Lesson 2

Choosing fabrics will be an ongoing part of this tutorial.
Many of the things I am showing you can also be applied to choosing fabric for other projects.

One way to choose fabrics is to start with a theme fabric that has a variety of colors which will give you a starting point to select the rest of your fabrics.
You will want to choose fabrics that:
1. Include darks, mediums and lights
2. Include multi color prints, prints with two colors and possibly prints that are what I call solid prints. These are fabrics that have one color but have texture added to them with a small print.
3. Plaids, stripes, checks and other geometrics can add interest to your collection.
4. Pick some bright colors and some dull subtle colors.
5. Fabrics should not be an exact match. It is better to be a variation of the colors.
5. And the most important rule: DO NOT PICK ALL YOUR FABRICS FROM ONE MANUFACTURER OR ONE COORDINATED FABRIC COLLECTION. If you do this all your work will be for naught as your finished project could look like you bought a preprinted panel!

I'd like to share sections of some students projects with you so you can see some groups of fabrics that work.


Look carefully at this group of prints used by a student and see how she followed my guidelines for selecting fabrics.


This shows the fabrics another student who followed the guidelines used.

I hope you will enjoy doing this as much as my students and I have.

You are also welcome to come along for the ride even if you do not do the project.
But I am warning you - when you see how much fun it is you may decide that you too have to become a part of this project.

Questions are always welcome.

Wednesday, April 28, 2010

On a Clear Day


Sharon, Fred, Suzie and Kerry are enjoying breakfast on the lanai. Today's menu was Door County fried eggs, bacon, juices, homemade wheat bread, fruit bread, cherry and black raspberry preserves and coffee.


This is my plate and I chose black raspberry preserves for my bread - delicious.

After breakfast Fred and Sharon had to leave as they had obligations at home later in the day. We were sorry to see them go and hope it won't be as long before we all are together again.

Kerry had a tee time and played 18 holes of golf.

Suzie and I went to our local quilt shop and each found some very interesting fabrics. I can't show them to you because some of them are for some secret projects!

We all then watched my niece Madison Richards appearance on C-span that I had recorded earlier. We we all very impressed with Madison and her two friends. These are girls to watch as I am sure they each will go far.


After dinner Kerry took Suzie and me to The Villages for ice cream and then we listened to the music and watched people dancing to a while. We were home before 9 as we all have had a busy most enjoyable visit.

We spent the rest of the evening relaxing. Suzie looked through my 3 books I have had made from my blog and was able to see many pieces of her work as they had been posted on my blog.