Showing posts with label my original idea. Show all posts

Thursday, March 24, 2022

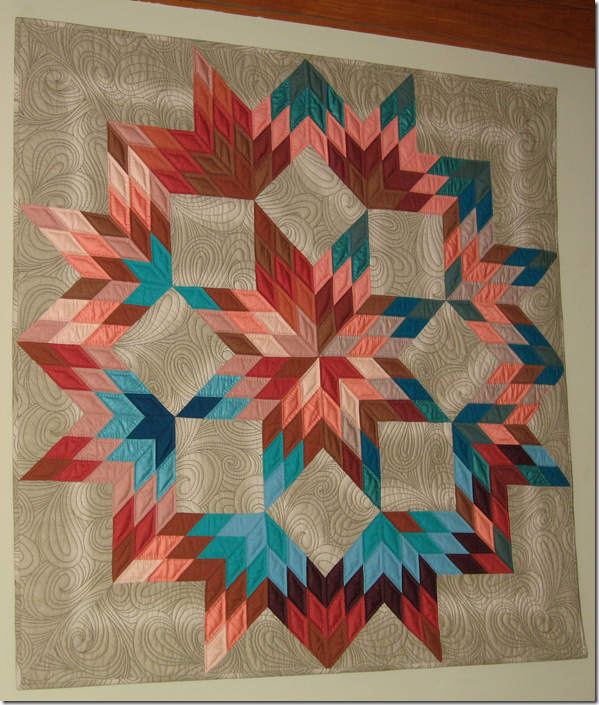
Broken Star,Quilt


Broken Star With Special Hand Quilting

image
I shared this quilt on a hand quilting list and everyone is going crazy over it.
The background fabric has these swirly line printed on it so the quilting follows those lines. 
The fabric also has an ombre effect which I used to advantage.
It was acquired by collectors of my work.

Sunday, January 23, 2022

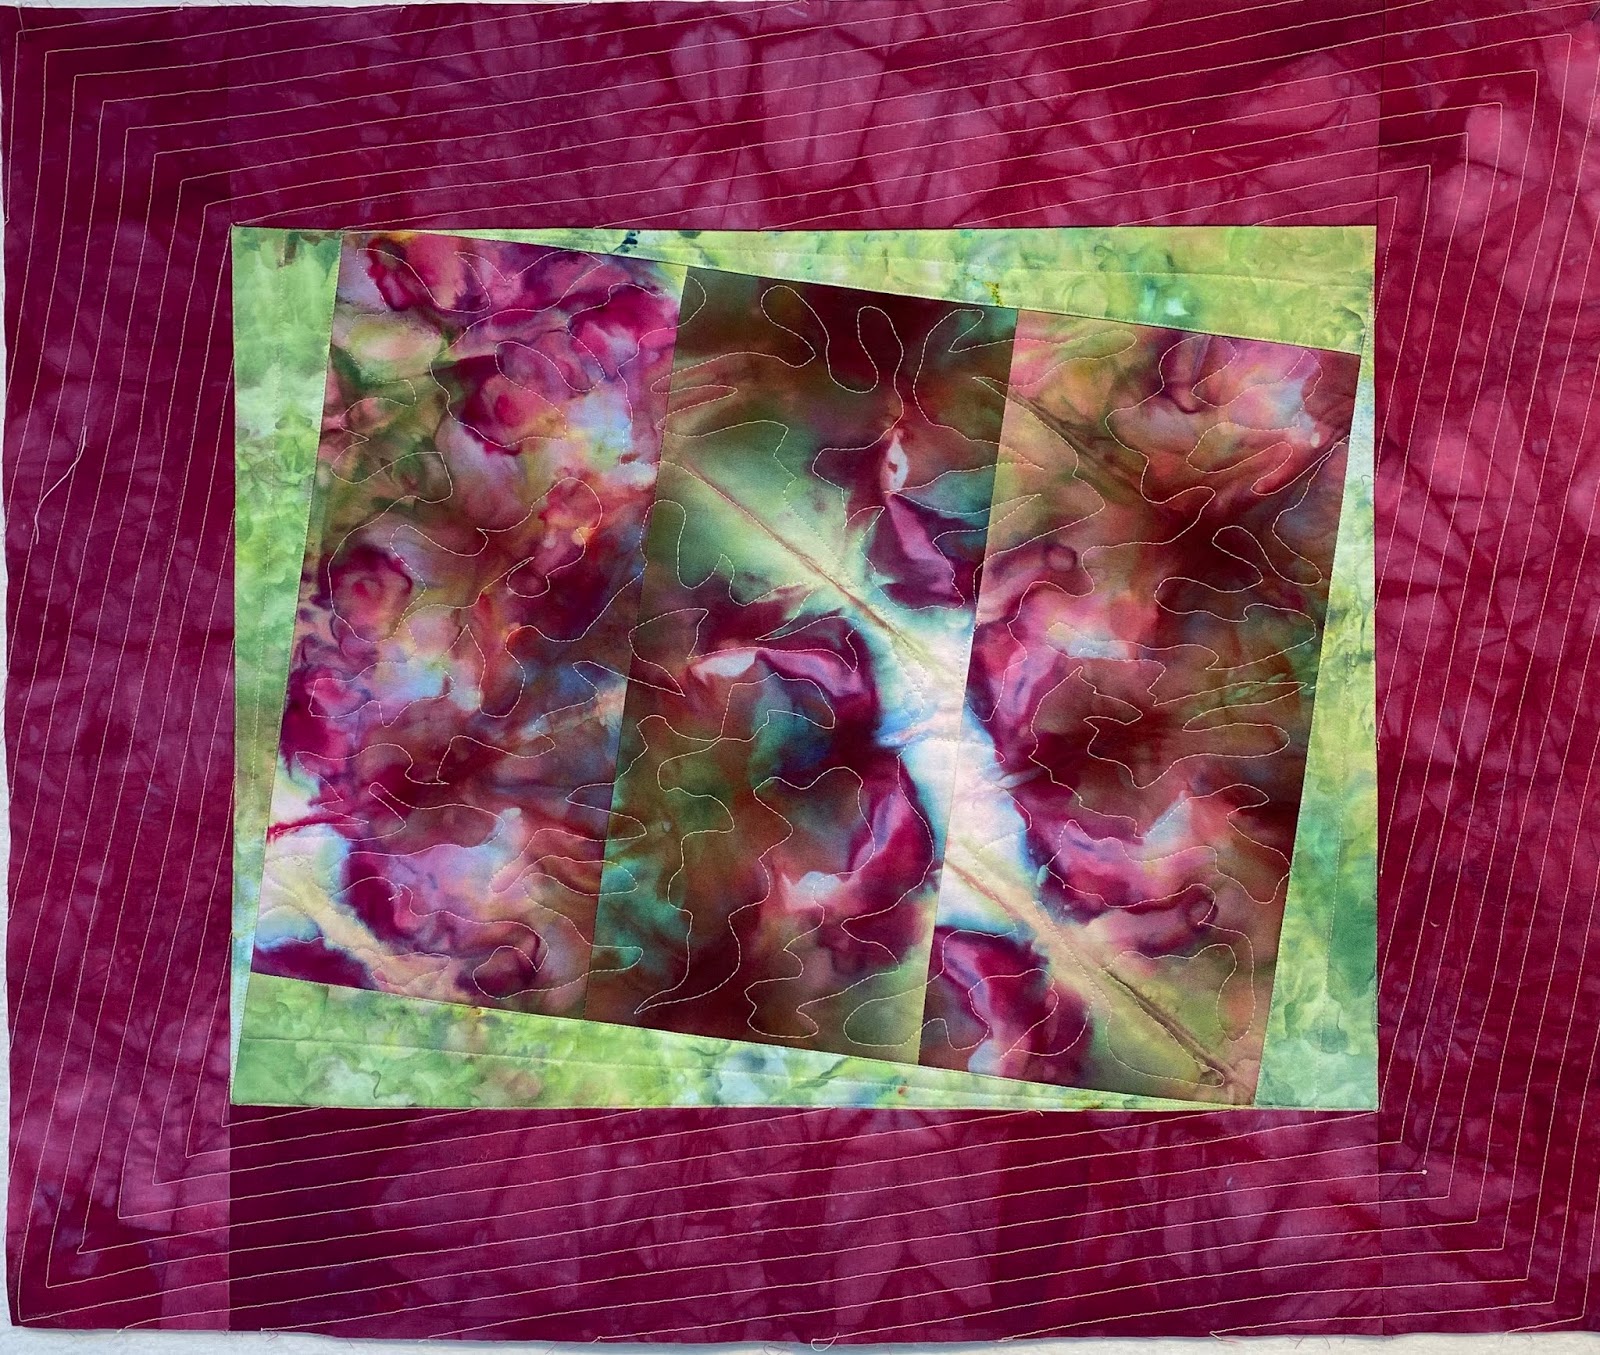
Second Quilt Finish Of 2022

This is a photo of a finished quilt that I cut and rotated and had printed on fabric.

This is the original quilt I made from hand dyed fabric that I photographed.
 

Tuesday, August 18, 2020

Ice Dyed Floral Quilt 3


This is the third quilt in the series I made from a gorgeous piece of my ice dyed fabric.
It is also the last as I used all the fabric. 

I used unique borders and quilting on this one.

Friday, July 17, 2020

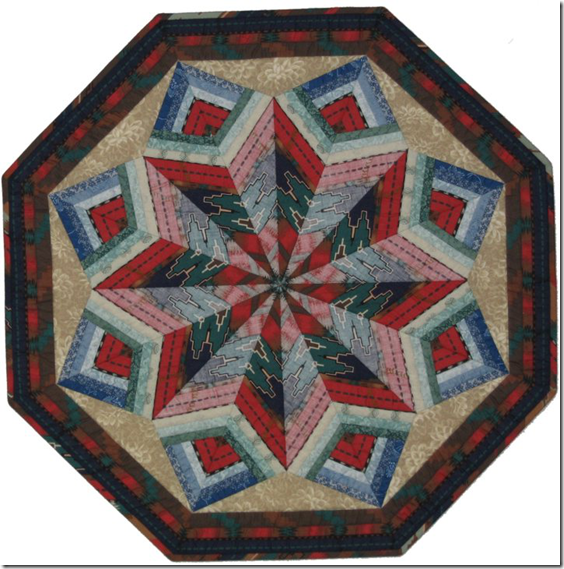
The Original Eight Pointed Star for One Armed Quilter

This is the very first quilt of this style I created. The quilting was finished very recently.
The idea came to me when I was in a great deal of pain and couldn't use my left arm.
I was looking at a typical 8 pointed star with diamonds that require precision piecing.
A light bulb went on in my head wondering if I could used strips rather than diamonds.
Using my computer and Corel Draw I designed this with rainbow colors, the first available palette. I could see it would work.
I had strips precut and selected strips in a similar color palette and started piecing.

I was able to sew it with just one hand and as I sewed my arm improved and I was able to continue creating these pieces for the 8 diamonds.
I just happened to have the rainbow arc fabric I used between each section.
It was very successful and I have made several variations along with teaching the class to many students.
Since the background is black it is harder to see the quilting, but if you can enlarge it you may be able to see it.


Tuesday, February 6, 2018

On Creating Original Work

It is much easier to create original work if you don't spend time looking at what others have done. I would never have created these I have if I had let myself be influenced by the work of others. It can be good to work in a vacuum.
image
Turning Point was created in the 1980’s. It started with a rectangular block I drew spontaneously.  The black you see in the center is actually a hole. It was the first quilt I had accepted in a juried ART show and went on to be included in many shows and win many awards.
image
Blooming Balloon was created with an adaptation of the same block. You could say these were a series of 2!
image
Santa Fe Rhythm was created by using the right and wrong side of the fabric to give it a dimensional quality.
image
Chocolate Peppers was the result of making units and them coming up with a design to put them together. The pieces on the edges were designed after I came up with the layout.
I have designed many quilts using this approach.
These are all fairly early quilts on the journey to where I am now.
My motto when creating is “To thine own self be true.”

Tuesday, May 9, 2017

Ice Dye Different - The Newest

IMG_2118
This is my most recent ice dye.
It is very different that anything I’ve done before.
I have mentioned before I am an ART ice dyer, not a production dyer.
Each piece I do comes from a new and different idea I have.

Tuesday, March 21, 2017

The Good Stuff

IMG_1897
I am sharing some thoughts on how I work in this post. It applies to all of my work no matter what the technique or medium is.
Now that my show is over it is time for me to work on new pieces.
I had an very general idea for a very simple work.
It is turning out not to be so simple but I hope it will be beautiful.
I started by pulling some pieces of beautiful hand dyed fabrics from my palette of fabrics. As I work on this I am continually adding more fabrics that will enhance the flow of this piece.
These are fabrics some people might feel too precious to use!
What you say? Use those gorgeous pieces of fabric? I can’t get any more of them and what if I want them?
They will never reach their potential sitting in a drawer because one is afraid to cut them up.
Remember, it is ONLY fabric and more can be created!
The fabrics you see here are just the beginning.
It is not going to be a quick project but I hope it will be successful.
When I start something, I have a very general idea of what I want to do.
As I work I watch when is happening and change course as necessary.
It is only then that a piece can hopefully reach it’s true potential.

Wednesday, December 14, 2016

What Is On Today’s Agenda?

image
Clue number 1
jacket ready to cutout
Clue number 2
This has been in the works and planning stage for a long time and it is on today’s schedule.

Monday, September 26, 2016

Sacred Spirits

image
This is the largest and most exciting Ice Tapestry I have created for my solo show.
It is 43 x 89 inches.
I doubt you can see the entire piece at once on your screen so I will add a smaller version here:
image
I hope you can see it all here, even though you get to see a lot more detail on the larger version.
When pieces get this long it is a challenge to photograph them. So you will have to visit my show to really appreciate this and also all the others.
I’m counting down to the finish of the works and I feel I am on schedule for my deadlines.

Monday, September 12, 2016

Another Finish: Geode Diptych

image
The color, patterns and texture of this fabric was something I fell in love with immediately when I finished ice dyeing it.
I considered using it for clothing, but my cooler head prevailed and it became this exciting 2 part quilt.
It is unlike anything else I’ve ever created. I can see it as ART in so many locations.
The colors would look fabulous in any room, office or business setting.

Tuesday, March 1, 2016

5th Quilt Finish For 2016

scroll quilt finished
It’s such a good feeling to finish another quilt.
When I started working with the red/yellow/green fabric I had intentions of creating something entirely different with it. I am open to trying something different when I see the original idea is not making the most interesting use of the fabric.
This one has been a joy from start to finish.
image  image
Using the satin stitch and the decorative stitches from my sewing machine in this way were something I had never done before. I was very pleased with the detail and accent they provided.
Who knows? This could show up on future quilts.

Thursday, February 25, 2016

I Can’t Believe I Quilted The Whole Thing!

image
Yesterday I decided to work on quilting this. I actually was able to complete the quilting.
I tried something new when quilting this….not with the idea of making the quilting better… but with the idea of balancing my body better as I quilted. I unplugged the foot pedal and used the on/off button on the machine itself. I did practice a little before I started. I have to say it was a lot easier than I expected. I did need to anticipate my stops so I could have one hand on the quilt and the other ready to press the button. I would not do this for something where I needed to be 100% accurate, but it worked great for the quilting. I did set the machine at 1/2 speed.
You may be able to get a closer look at the quilt on your computer by clicking on the photo.
I’m hoping to get this finished soon..but I have a few decisions to make first.

Monday, August 17, 2015

Criss Crossed Quilt

This is my most recent finish.
image
This was a challenge to create with the 1/8 inch red insets. Parts of it are from fabric I designed on Spoonflower.
The black/gray section is my shibori fabric and the red is a solid hand dyed fabric.
image
The fabric I used to back it reminds me of a crossword puzzle.
I like to finish the back of most of my quilts with facings and a casing to hang them. This was no exception.
Although you may have heard I have a goal of imperfection, that is not the case with my quilts. I may be the queen of facings as mine are perfection and help the quilts hang perfectly.

Monday, August 10, 2015

Second Largest Quilt–Jubilation

This is the second largest quilt I have ever made. The only larger one is the bed spread/quilt I made for our king size bed.

It started out to be 108 inches square and after quilting ended up 104 inches square.

image

Quilting a quilt this size on a domestic sewing machine is a major challenge. Quilting this one was MORE than a major challenge.

I had planned free motion quilting for the curvy lines on the background. I had machine trouble doing that so the entire quilt had to be done with the presser foot down, stopping and turning each time the lines changed direction. I had less than two weeks to quilt and finish this quilt in my spare time as I was working at the time. I still am amazed when I look at this and see how I was able to quilt it so beautifully, even with the challenges I faced.

I finished it in time and it was hung in my husband’s new office until he retired. It was quite impressive in the space. The office had proper lighting and no exterior windows so the quilt is in mint condition.

The pieced sections were made with a variety of solid commercial fabrics. They were cut with a special triangle shape ruler which was new at that time.

I sketched the design of the quilt but couldn’t complete it as I had no source for fabric that shaded from light to dark gray. When I learned more about dyeing fabric I created the grey fabric.

I had to dye several batches to get enough to complete the quilt.

We don’t have any wall in our house that is large enough for this quilt.

It is available for sale. It would make a perfect piece of art for an office or a home with high ceilings. I can see it in a log cabin out west!

Saturday, May 16, 2015

How Can You Design A Quilt With One Of A Kind Fabric?

I have been doing a lot of fabric dyeing recently.
Each piece is one of a kind.
So many people live in fear of using these fabrics because if they make a mistake there is no more.
image
If I wanted to use this piece of fabric knowing there was no more if I made a mistake I would print it with my computer printer.
If would be a good idea to make multiple copies. Be sure you make a note of the size of the original piece of fabric as you will want all the others you print to be sized at the same ratio to the original.
image
This is a smaller piece of hand dyed one of a kind fabric that I would consider using with the one above.
image
This could also work with the other 2 fabrics.
image
I could also use this fabric.
In addition to all of these I could also use some solid or almost solid hand dyes. I would take photos of those too and print them.
I do recommend saving the images of each fabric so you can print more if you like.
I hope you will no longer be afraid to cut and use these gorgeous one of a kind fabrics you create.
You can also use this same idea if you have a “too precious to cut” commercial fabric or have a limited amount of a specific fabric.
Once you have come up with a design you like all you have to do is cut it from your fabric in the appropriate size.
You could use a very simple traditional quilt pattern and make it very contemporary with your one of a kind fabric. Simple designs are usually the best way to use these complex fabrics.
UPDATE: One person commented that it is NOT appropriate to scan and print commercial fabric. I am not suggesting you scan and print it as fabric. I am suggesting you scan to a paper copy to play with to decide how you will use it. That is a perfectly permissible way to design.

Monday, February 9, 2015

Negative Positive Game Quilt

Knowing that our quilt group had just a few people in attendance the Wednesday before Thanksgiving I came up with an idea to boost attendance in 2014.

It worked as we had a lot of people come.

[image%255B9%255D.png]

Of course I had to do some preparation to share this idea/technique. I did make up all the squares and fused squares everyone used.

While watching TV I did some cutting of images to use on the squares. I did get a little carried away.

I had enough to do this quilt which is 7 squares by 8 squares.

image

Can you find the blocks with the matching images?

Sometimes using a different background can make it next to impossible to see that they are done with the same image.

The quilt is finished and has a top and bottom rod pocket so it will hang straight.

It’s really a fun technique to do and I couldn’t stop until it was finished.

Wednesday, January 7, 2015

World’s Smallest Quilts


I created these quilts in 1985 and they were documented in Quilters Newsletter in 1986. In this photo you may be seeing them life size or larger depending on your computer screen.


The above article is clickable to see a larger version that you can actually read.
It's hard to believe I made these 30 years ago. Where does the time go?
In the smallest quilt the strips are 1/42nd of an inch wide. The quilts have a very thin layer of batting, are hand quilted and have the narrowest binding possible. They are real traditional quilts made in a block format, rather than a single block or an embroidered quilt.

Thursday, August 14, 2014

Circle Quilts Installation

I am sharing the installation photos of the final two quilts in the guest room

image

Secret Circles – How many circles and you find?

image

………And Then The Centers Fell Out

These have been hung on the opposite sides of the bed!

Thursday, May 29, 2014

Signed, Sealed And Ready To Deliver–Grandmother’s Garden Flower

image

I have finished my quilt for the Quilt Alliance contest and fund raiser. I am very pleased with it. Even my son said it looked like a flower when he saw it!

I will be sending it to them today and that will be the last time I will see it.

If you are a member of the QA I’d sure appreciate your vote. If you aren’t, it’s easy to join and a great way to celebrate the past and present history of quilting. Quilting is primarily a woman’s art. I know of no other woman’s art that has such a great history organization.

This link will take you to the page with membership information:

http://www.allianceforamericanquilts.org/support/support.php

image

The back of the quilt with facings, a casing for a hanging rod and a custom label printed on fabric.  I always put beautiful backs on my quilts. The back, facing, and casings are also made from my hand dyed fabrics.

image

I printed this label on fabric and sewed it on the back.

The quilt will serve several purposes.

1. There will be a contest with fantastic prizes for the winners.

2. The quilts will tour and help raise awareness to the fact that there is a Quilt Alliance and also allow many people to see them in person.

3. The quilts will be auctioned on eBay to raise funds to support the Quilt Alliance.

If you love this quilt, you could become the proud owner sometime next fall. I will keep you aware of the dates for the auction.

Tuesday, December 31, 2013

5003 in 2013!!!!!!!!!!!!!!!!!!!!!!!!!!!!

I DID IT!
I reached by goal of getting rid of 5000 things in 2013.
My original goal was to get rid of 2013 things, but when I reached that in less 4 months I set my sights higher.
The day/year isn’t over and the total could increase.

It’s a great feeling and I do feel lighter.There are a few areas in the house where there can be no more purging. They are stripped to the bare necessities.
The closets have empty areas and each section allows the clothes to move easily so I can see what I have.
image
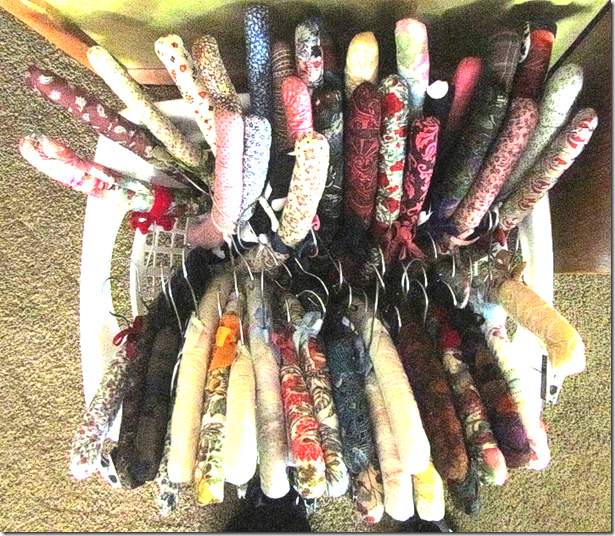
Just a few of the hangers I’ve emptied this year!
Yet sometime in 2014 I will be listing more of my beloved Blue Fish clothing and other special treasures on eBay.
I’ll also be listing patterns, books and possibly other items for sale on eBay.
Most likely that will not begin until June or July.

Yes, the studio storeroom is a candidate for purging in 2014 or 2015!
There are some areas in the basement that are ripe for a purging.
There is an area in the basement that is “none of my business” and I won’t touch that one.

Will I set a goal for 2014? I probably will, but it will not be 5000. More than likely it will be 2014!
I know myself well enough to know that using numbers makes me work at this more seriously.
I also know that I work better if I count down rather than count up.
Yes, I AM a numbers person!!!
So on this last day of 2013 I bid you farewell and hope you too are looking forward to 2014.