Sunday, March 17, 2013

The Beginning Of A Quilt With My Own Fabric Design

If you follow this blog or my Facebook page you know I am working on designing fabric.

I would like to share the beginning of the quilt I am making with one of the fabrics.

image

I cut the fabric between the design rows. By cutting it like this I have 3 border strips on the left and one on the right.

This will allow me to have complete design units from the wide strip.

image

I have the border strips loosely pinned to the design wall to give me an idea of how the border will work.

I haven’t trimmed 2 of them to the width yet. Disregard the different colors on the strips as that was caused by the lighting in the room.

I realize it is unusual to design a border first, but this is what the fabric is telling me to do.

Stay tuned as I will show the quilt as it progresses.

image

This is the fabric I designed and had printed at Spoonflower. I had asked your thoughts on whether or not I should have it printed and available for you to purchase.

Your responses were so favorable I have decided I will make it available. I will let you know as soon as I have make the necessary arrangements.

Thursday, March 14, 2013

My Fabric Designs

image

This is one yard of 42 inch wide fabric. I designed it and had it printed at Spoonflower.

I am so pleased with it. It could be used as a border around a quilt. There are 4 vertical repeats and to the best of my knowledge most quilts have 4 sides. If you wanted a narrower border you could do half a repeat and get 8 strips.

You could also cut the individual motifs and use them as alternating blocks or featured blocks in a quilt or wall hanging.

I had it printed on Kona cotton and it is wonderful. I am sure I will be ordering many more yards of this.

image

This is a close-up of the design.

My granddaughter is taking a black and white photography class at the Glasgow (Scotland) School Of Art. I am thinking her photos printed on fabric could be awesome combined with this fabric.

I also would like to see it combined with bright colors.

Rather than iron this and iron out the fold lines I have left them visible so you can see this actually is a piece of fabric, not just a design.

I have also had several other fabrics printed.

I am considering whether or not to make some of them available for sale through Spoonflower.

If any of you would purchase this if I made it for sale let me know. That will help me make my decision.

Wednesday, March 13, 2013

Wearable Wednesday

image

As I was thinking about the Violet Vest I made I remembered I had made another vest years ago with almost the same colors.

The design and fabrics are quite different. At the time I made this one it was very hard to even find good solid colored fabrics.

I think this one was sold.

image

Here is another vest I made in similar colors. This is my Texture Vest pattern. It has “wrinkling” and stitching with heavy thread in the bobbin, a slashed band and a shirt tail hem.

The length and styling make this a very flattering style for all sizes.

image

One of the presentations I used to do was a style show of my wearable art. This is a group of models from one of them.

You may recognize the Almost Crazy Vest from the pattern front.

I hope I am inspiring some of you to create your own wearable art.

Tuesday, March 12, 2013

Velvet Vest

image

This vest was a bigger challenge to photograph than it was to make. It is a very drapey garment and I did my best draping it without it being on a body. I haven’t mastered taking photographs of myself without my looking absolutely ridiculous!

image

For the back I was able to feature the circular design off center and towards the top.

I used my Prairie Point vest pattern as the basic shape for this.

image

I know, it looks nothing like the pattern, but that is the advantage of using patterns that feature basic shapes that can be changed to fit your ideas.

The fabric is a dyed cut velvet from a well known wearable art designer.

I am really enjoying wearing this and feel great when I do.

Monday, March 11, 2013

Violet Vest Visit!

image

This is the front of the vest. I think you can see that I used all the fabrics I used in the vest for the binding. I sewed them together and did a bias binding which allows you to shape the binding to the curves.


image

Here you can see the back. You can also see the lining as the points from the front hang below the back in the photo.

I’m quite pleased with it.

I think the fact that I made it with what I would call zero waste (after squeezing a pin cushion and a small quilt out of the scraps too small to use) makes me even prouder of what I accomplished. I do not intend to make zero waste a habit though.

Sunday, March 10, 2013

The Return Of The Sea Of Red

image

Who’d a thought when we were in second grade, Junior High and High School that we’d live less than a mile from each other in another state?

Long time friends are the best friends! And the best part….after not seeing each other for over 50 years we both recognized each other when we met again.

image

Although I didn’t meet Mary until I moved here she and my sister were good friends in high school. Dodo is another friend I met here, such a neat lady.

image

Pat (left) and I were high school classmates. Mary (right) was someone else I met after we got here – but her husband and my other sister went to high school together.

image

Jerry B and Ron have everything under control.

Ron was also a high school classmate.

image

When I took this picture Marilyn (right) said “Oh we’re going to be on your blog!”

image

A small portion of the sea of red. How many people does it take to make a sea of red you ask?

Somewhere around 200!

image

Linda was just visiting from Wisconsin. I met her once briefly when she worked with my daughter in law about 16 years ago and I recognized her.

My apologies to all my friends who didn’t make the cut to get on my blog this year. It’s not your fault. The sun was against me and I had to do a lot of editing to the pictures you see.

Thursday, March 7, 2013

Origami Flying Geese

image

I made these flying geese and sewed them into strips 7 or 8 years ago. I finally sewed them to the border stripe that separates them.

The stripe, which I purchased way back then from who knows where) was the perfect fabric to make the geese fly!

I am hoping to quilt it very soon.

image

This is a close up of the stripe.

Wednesday, March 6, 2013

210012 Palindrome Number

According to Neocounter I have had 210012 visitors to my blog at 8:28 p.m – another palindromic number.

I’m sure most of you could care less, but it doesn’t take a lot to amuse me!

Improv 1

image

I had a lot of white silk faille strips of various widths. I decided to piece an improvisational quilt with them.

I had originally intended to paint this after I pieced it. I liked the look of the resulting work with the seams showing.

I thought about it and decided to quilt it instead.

I quilted it and am not sure I am done quilting yet so I’m not showing the quilting yet.

It reminds me of an old quilt made as a utility quilt from left over strips of cotton or muslin.

It also has the look of a quilt from the new Modern Quilt movement.

Making an all white quilt is something new for me. I am really enjoying the process.

Tuesday, March 5, 2013

Vivacious Violet

image

This is my second quilt finish for 2013.

You have seen this before but the quilting pulls it all together and adds another dimension to the work.

The quilting is one continuous line.

I’m on a roll and have other works in progress…………….

Since you asked.......it is approximately 6 inches by 8 inches!

Monday, March 4, 2013

Boundary Waters–First Quilt Finish of 2013

Although I have finished several other projects, this is the first quilt I’ve finished in 2013.

image

I gave the demo for facing a quilt to my art quilt group last week and finished the quilt, including the hand sewing down of the facings and rod pocket.

image

I used this great batik for the back of the quilt, the facings and the rod pocket. I always try to use fabrics that relate to the front on the back of my work,

The group enjoyed the presentation and I know at least one of the members has already made a quilt and used the techniques to finish it. Way to go Beth!

Saturday, March 2, 2013

2013 in 2013

image

I just got this crazy idea. I’m going to try to get rid of 2013 items in 2013.

I didn’t start this until a few days ago so I’m a little behind, but I hope I can make it up.

image

I can get rid of them by selling them on eBay, giving them to someone, donating them somewhere or for things past their prime…throwing them in the trash.

As of today I only have to get rid of 2001 more things!

I think this is going to be a real challenge as I have been working on this for the last few years and there is less to dispose of.

Having this goal is making me think of what I have that I no longer need and how I can pass those things on to someone. In fact I jumped up and did start looking for more things before I finished this post!

Anyone else want to join me in this challenge?

Tuesday, February 26, 2013

It’s Not Over Until It’s Over!

image

I made this pincushion from my pile of BIG scraps.

image

I stuffed it with scraps of wool batting. It is about 4 x 5 inches. It’s perfect to keep my pins separated by different colors and sizes.

image

This is the quilt I made with my “scraps too small of use”! It is 6 x 8 inches.

image

And just as there is a beginning, there also is an end. These are the little bits I had left and they all went into the trash!

Monday, February 25, 2013

Violet Vest Leftover Fabric

I had planned on showing you the finished vest today. I did the hand sewing on the binding last night while I watched the Oscars. I still have more than half way to go.

So instead I’ll show you the fabrics I have leftover.

image

I photographed these on my 12 inch square Olfa matt to give you an idea of how big they are.

I call these “scraps too small to use”!

But wait……….. I have bigger scraps too…………..

image


Yes, these are the BIG scraps I had left after the vest was bound. The strip of the stripe was all the extra binding I had.

I don’t think I’ve ever cut it this close on a project before. Being able to make something and make it work while working so tight can only be accomplished with my history of sewing for years and years.

Of course I’m not done with this fabric yet. Stay tuned to see what I do with the leftovers!

Saturday, February 23, 2013

Violet Vest Components

image

I have the back and both fronts ready to put together. I used ALL the fabric I had to make this happen.

Each of the 5 pieces was a fat quarter. I love a challenge and this definitely was a challenge.

image

I measured the pattern and knew I would need 176 inches of binding.

I was able to piece a bias binding with the fabrics I had left after making the patchwork vest pieces.

I have 182 inches of binding. It took a lot of math and a lot of creativity to make this happen!

I can’t wait to put this all together later today.

Friday, February 22, 2013

Vest Variation In Violets!

image

When I finished making my new jacket it put me in the mood for making wearable art.

This is a section from the center of the back of the vest I started yesterday.

I am using my Almost Crazy Vest pattern to make it.

It looks NOTHING like the pattern. All of my patterns are flattering basic shapes and this was the perfect style for the piecing I am doing.

image

This is the picture of the original Almost Crazy Vest from the pattern front.

I am piecing this directly on the lining. I don’t want a heavy warm vest.

I have also started piecing the fronts. I am working from the centers out to the side seams. This will allow me to keep the most interesting parts of the design where it can be seen.

I hope to finish the piecing today and possibly get the entire vest finished.

Thursday, February 21, 2013

Sometimes There’s More To A Piece Of Art Than Meets The Eye!

image

I couldn’t wait for this to arrive.

It was so much more than what it looked like in the pictures. I had committed to this acquisition about 3 p.m. on the 13th of February, a Wednesday afternoon.

I unpacked it and hung it right away as I knew exactly where I was going to put it.

It is 3D and amazing. There is so much symbolism in it.

It was also the beginning of strange story.

At 10:30 that evening I opened my front door for something and thought I saw something whizz by. I thought it was probably a bug.

I closed the door and looked around and there was a BIRD sitting up on my big quilt in the great room.

What to do? I opened the door hoping it would go back out, but didn’t see it go out.

I looked around the room and couldn’t see it so I decided to look in the rest of the house.

It had gone through the master bedroom and into the master bath,  which meant it had to take 2 left turns to get there.

I had the presence of mind to close the door to the master bathroom. Then what?

I felt it was too late to call anyone so I walked down the street and saw a neighbor who I thought could catch it for me still had their lights on. He came over and spent about 10 minutes trying to capture it with an old bath towel. It was in the tiny room that just has the toilet. He finally got it and took it outside for me. I was so relieved.

End of story? Oh, No!

Sunday evening I had friends over for dinner. They all left about 9 p.m.

After they left I heard a chirping sound and figured I hadn’t shut the refrigerator. I got up to do it and the bird was BACK – flying across the kitchen part of the great room. This time I had the presence of mind to close all the doors off the great room and open the BIG sliding doors to the lanai. Took a walk down to the neighbors and they were gone. So I called one of the friends who had been here for dinner and Lynn said “John will be right there with his net.”

He got here in record time. I was not sure whether the bird was on the screened lanai or still in the great room hiding in the artificial greens on top of the cupboards.

When we were sure it was on the lanai I closed the doors so it wouldn’t come back in. We turned on the lights which just drove him up to the 20 foot ceiling. John threw the chair cushions up in an attempt to get him down. John figured it was a better idea to turn off the lights and so I got him a flashlight lantern. The bird then came down to the floor and tried to hide under the furniture. John caught him in the net several times and he kept escaping. Finally he got him and took him back outside.

He came in and said “He was such a cute bird and he’s out in the tree in the back”. I said I didn’t think he was so cute.

I tried to get a picture of the bird when he was on the floor but was not successful. I have no idea what kind of bird he was and I couldn’t find one that looked like him on line.
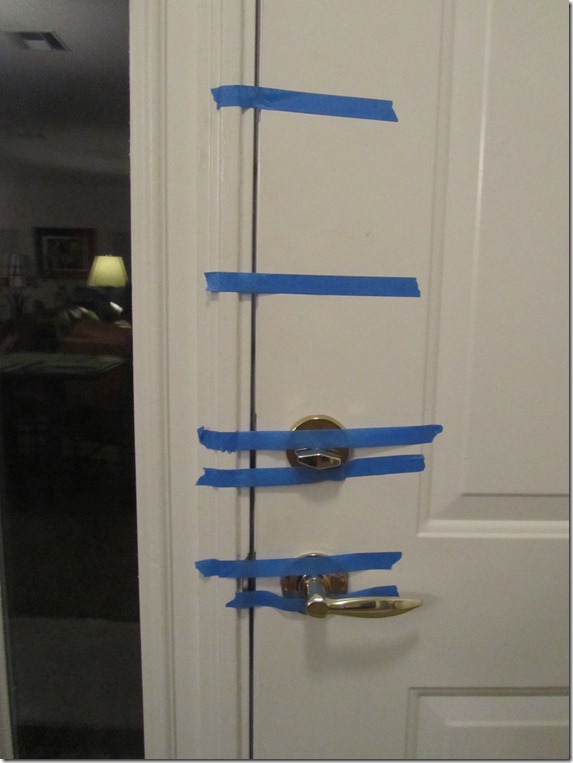
taped door 001

I have taped my front door shut so I don’t forget and open it for a while. All guests will have to come in through my messy garage.

I also took the wreath off the front door which could have been attracting him and put it in a bag in the garage so he wouldn’t come in the garage when I opened the door.

I am so lucky to have such wonderful friends and neighbors.

Life at “Seldom Inn” is never dull! I wish it had been last week.

Wednesday, February 20, 2013

200 Shibori Fabrics I Dyed - Rerun


handkyedassort

I am laying all my fabrics I recently dyed on my ironing table. I thought I could take a picture of all of them, but I can’t get up high enough to get them all in the picture. Almost all of them were arashi shibori dyed on PVC poles. Many were dyed more than once.

Had dyed assortment2

It is going to take me several pictures to show them all to you.

By having them all laid out like this I can see what I have and I can start using them to design more compositions.

200 pieces of fabric are a lot. Some pieces are a half yard or more. Others are fat quarters or notebook paper size.

Whatever size they are, they are all exciting to see – IMHO!

handdyedfabrical3

I overlapped these more so you could see a wider range of the fabrics in one photo.

handdyedfabricall5

This shows some of the fabrics that were larger pieces. The patterns on many of them spanned the width of the fabric.

My goal was not to dye as many fabrics as I could. I was just trying to get a good assortment and a variety of types of fabrics.

I also usually mixed up too much dye so rather than throw it out I just kept dyeing.

If you try to count them and don’t find 200 it is because I have already used quite a few of them.

Sunday, February 17, 2013

I Guess The Weather Woman Wanted To See My Coat!

image

I didn’t expect to be able to wear this coat in Florida since out temperatures have been in the 70’s and 80’s.

Today we expect a high of maybe 50 and we haven’t reached it yet at 2:30 p.m.

So guess what I wore to the grocery store?

That’s right………….

Saturday, February 16, 2013

Playing With My Paints On My Fabrics - Again

image

I have been rolling fabrics on poles getting ready to do some fabric dyeing. Many of the pieces I am using were previously dyed and needed another layer.

This was in that group but I decided overdyeing was not the way to go so I got out my paints and added some stamping to it.

It had previously been dyed twice. I think it is finished, but I will let it wait and see if I think it might benefit from another layer of pattern.

image

The fabric I started with for this piece had been previously painted with thickened dyes. I thought it was dull and boring.

I added two more layers of design with stamping. As I look at this I feel it still may need something else.

I am going to hang both of these on my design wall so I can study them and wait to see if they need anything else and what they need.

By the way, I started working on these late last night and worked until 11:30 p.m. – sometimes that’s the best creative time for me.

I'm posting this puzzle to keep your brain sharp on this lazy weekend! Click to Mix and Solve

Friday, February 15, 2013

Mystery Project Reveal!

I have completed my mystery project which used the silk that used to be on my pillows.

image

This is a jacket I made from my Blue Ribbon Pattern 116 Slashed Jacket.

image

This is a close up of one section of the jacket. You may be able to see the colors of some of the pillows I recycled into this jacket.

The base (or inner layer) of the jacket is black silk noil.

The outer layer is a soft rust dupioni silk.

The many layers between them are composed of the silk from the pillows and a collection of small pieces of dupioni silk I had.

In some places there are as many as 12 layers and in others just a few.

One of my goals in making this was to only use fabric I had on hand. I became reacquainted with my fabrics when I did my recent studio reorganization.

If you would like to see the various layers I created you can see them at this blog post:

http://quiltspluscolor.blogspot.com/2013/02/my-colorful-mystery-project.html

I really enjoyed creating this jacket. It has been a while since I created any wearable art, but I think there will be more in the not too distant future.

I am really going to enjoy wearing this jacket. When it is on a body it drapes so beautifully.

I hope you enjoy finding all the colors from the pillows as you work this puzzle! Click to Mix and Solve